The drywall guys did a great job installing how I wanted it done. See the photo gallery for 12 photos of the drywall job. Green glue was used between each drywall layer, and acoustic caulking (brown or grey) was used to fill the gaps and seams between each wall. As the guys installed the drywall, I was already able to hear the sound reduction.
Next: Installing XPS foam, and then subfloor in the two rooms.
Thursday, November 15, 2012

Wednesday, November 14, 2012
Drywall photos
A couple of 180 degree panoramas of the drywall work...
.jpg) |
| Main living area |
 |
| Home theater |
Wednesday, August 1, 2012
Final photos before drywall
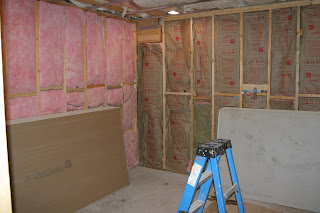
Drywalling is about to start. I've added some last photos to the gallery showing the insulation that was added to the soundproof rooms. I used a mixture of Rock wool and standard fiberglass insulation.


Cable testing
Before the walls are sealed up, I am testing HDMI and RG6 cables with well priced cable testers from monoprice.com. Also finalizing all wiring, including some water detectors for places where I have had leaks before. These will eventually be connected to a Sensaphone WEB600.
Monday, July 9, 2012
HVAC Baffle Box design is available
My HVAC Baffle Box design is now available in the Google Sketchup library (note: each baffle box was unique and this is just one of the larger ones):
Tuesday, January 10, 2012
Rigid fiberglass duct board
Here is a link to the product I used to line the baffle box: Certainteed Ultra Duct Black Duct Board (1 inch)
Monday, January 9, 2012
HVAC baffle box implementation
All 5 baffle boxes have been built and installed. This took around 35 hours with the help of a friend. If everything went smoothly, it could have taken around 25-30 hours. However, installing these things in tight spaces can take time, and on a couple of occasions we found a problem at the end and had to remove the box and fix the problem.
 |
| From Basement |
Pictures of various baffles being built can be viewed in the photo album. The basic process was as follows:
- Cut box pieces out of MDF using dimensions from pre-designed "Google Sketchups".
- Cut holes in MDF where necessary (I used a jigsaw).
- Build boxes minus one side so insulation and baffles can be installed. Predrill screw holes to avoid cracking in MDF.
- Apply acoustic caulk to all interior edges.
- Cut rigid insulation pieces to size and glue into place with spray adhesive.
- Paint duct sealant over all edges and exposed fiberglass to ensure no fiberglass will enter the airstream.
- Install baffle box and attach ducts.
- Install final face of box and do any last minute sealing.
- Turn on HVAC system to ensure proper airflow (one of the boxes had weak airflow caused by a duct being bent too sharply. We had to pull the box out and trim the duct connector).
 |
| From Basement |
In the photo album you will see that the recording studio return baffle box is installed in the room space instead of hidden behind a wall. This is because there was no room to hide the box. The baffle box will be drywalled over.
Subscribe to:
Posts (Atom)